Creating A Home Siem Lab
Security Information and Event Management (SIEM)
In today’s rapidly evolving digital landscape, organizations are constantly under threat from cyber attacks. To effectively protect against these threats, businesses need a robust system in place to monitor, detect, and respond to security incidents in real time. This is where Security Information and Event Management (SIEM) comes into play.
SIEM is a powerful cybersecurity solution that combines two critical functions: Security Information Management (SIM) and Security Event Management (SEM). Together, these components provide a comprehensive view of an organization’s security posture by collecting, analyzing, and correlating data from various sources, such as firewalls, intrusion detection systems, and antivirus software.
At its core, SIEM serves as the central hub for security operations, offering several key benefits:
Centralized Monitoring: SIEM systems aggregate security data from across the entire IT infrastructure, allowing security teams to monitor network activity, identify potential threats, and gain real-time insights into security events.
Threat Detection and Response: By analyzing patterns and correlating events across different data sources, SIEM helps identify anomalies that may indicate a security breach. When a potential threat is detected, the system can trigger alerts, enabling security teams to respond quickly and effectively.
Compliance and Reporting: SIEM plays a crucial role in helping organizations meet regulatory compliance requirements by providing detailed logs and reports on security events. This ensures that businesses can demonstrate their commitment to protecting sensitive data and adhering to industry standards.
Incident Investigation: In the event of a security incident, SIEM allows for in-depth forensic analysis by providing a comprehensive audit trail of all network activities. This enables security teams to understand the scope of the breach, identify the root cause, and take corrective actions to prevent future incidents.
Setting Up Your Environment
Elastic Account
- Creating a Elastic free trial account (no credit card needed) https://cloud.elastic.co/registration

Once you have an Elastic account, log in to the Elastic Cloud console https://cloud.elastic.co
Click on the “Create Deployment” button and select “Elasticsearch” as the deployment type.
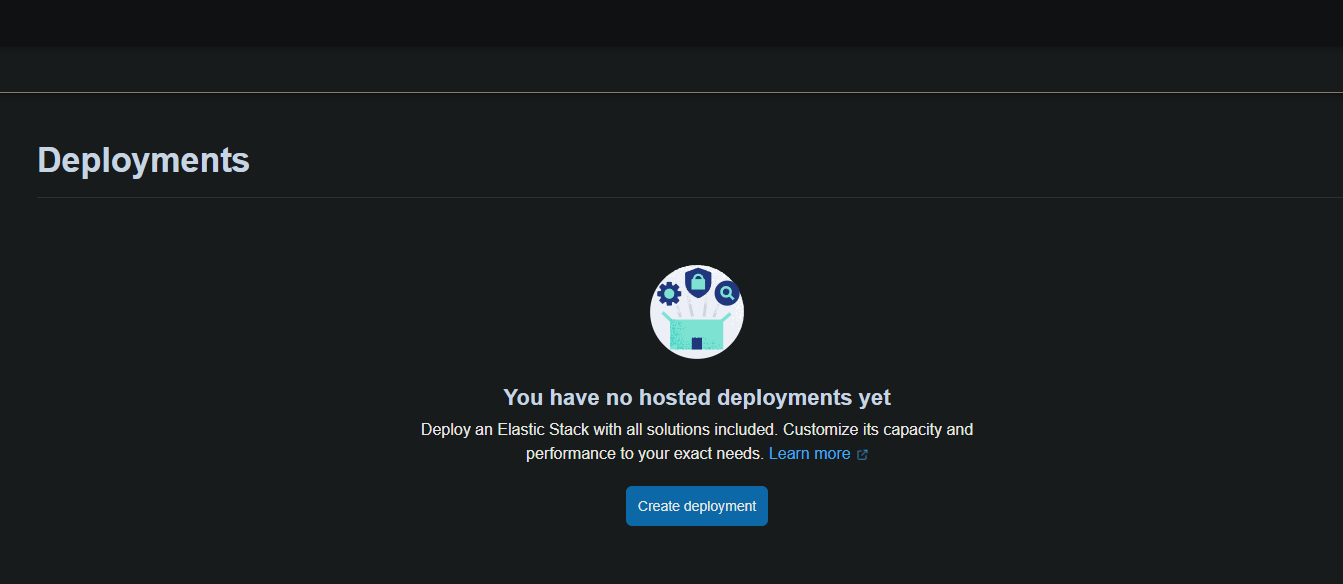
- Choose a region and deployment size that fits your needs and click on “Create Deployment.”
- Wait for the configuration to complete.
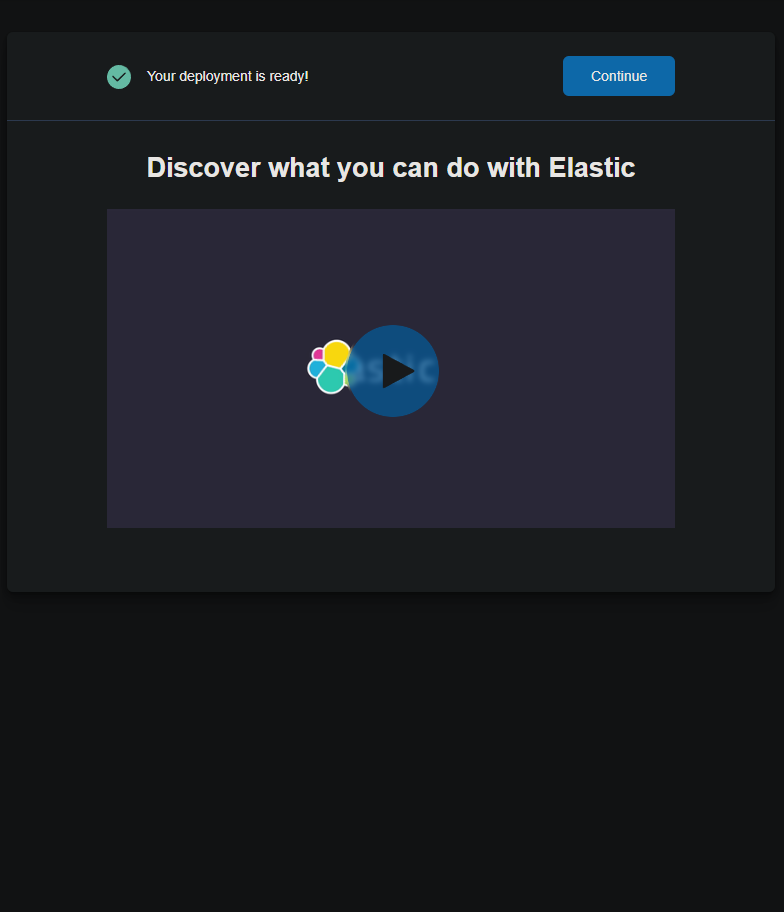
- Once the deployment is ready, click “continue.”
Set up Kali VM
- Download the Kali Linux VM from the official Kali website at https://www.kali.org/get-kali/#kali-virtual-machines.
- Create a new VM with the Kali VM file in your preferred virtualization platform, such as VirtualBox or VMware.
- Once the installation is complete, log in to the Kali VM.
Set up Agent to collect logs
An agent is basically a software tool that you install on a device, like a server or an endpoint, to gather and send data to a central system for monitoring and analysis. When it comes to Elastic SIEM, the agent’s job is to collect security-related events from your endpoints and then forward that info to your Elastic SIEM setup.
- Log in to your Elastic SIEM, then head to the Integrations page by clicking on the Kibana menu in the top left and selecting “Integrations” at the bottom.

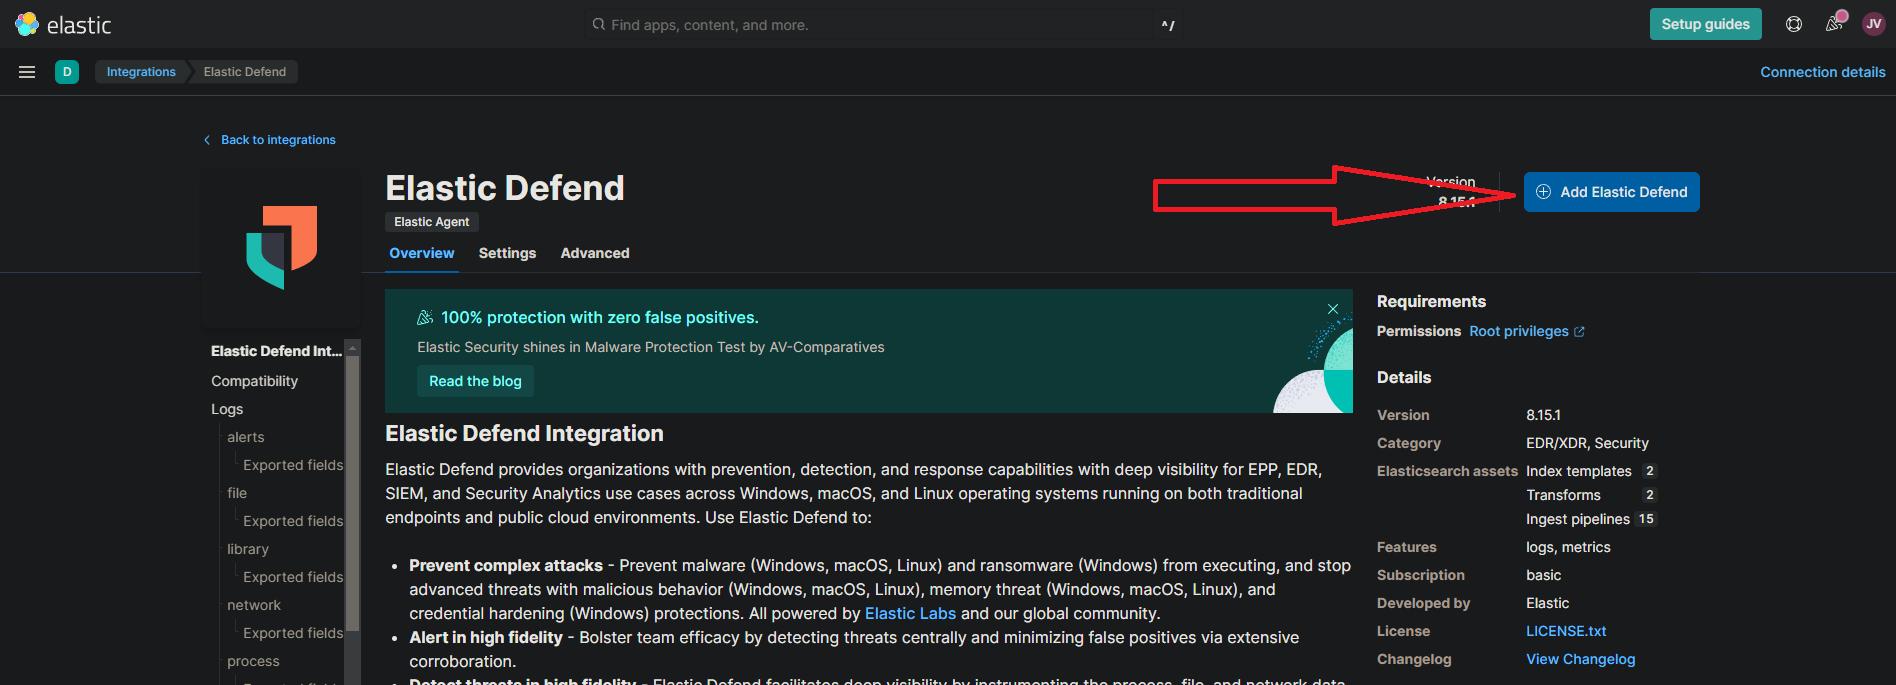
- Search for “Elastic Defend” and click on it to open the integration page.
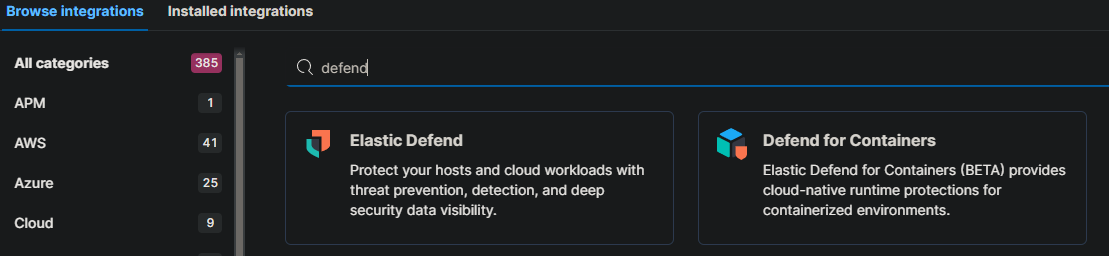
- Click on “Install Elastic Defend”
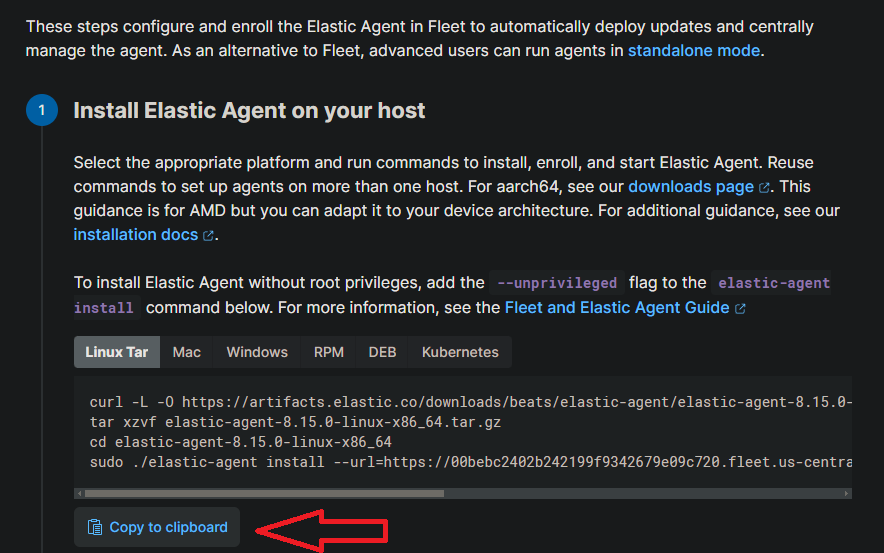
Note: It might look like this.
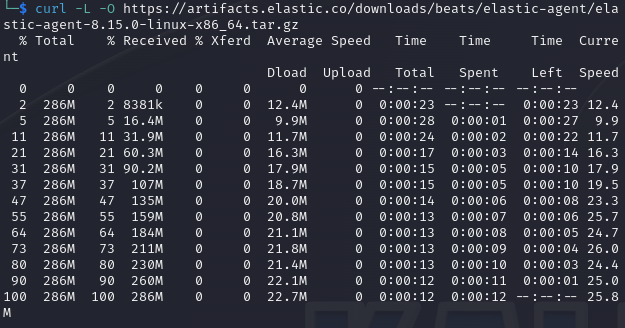
- Paste that command into the Kali terminal (command line).
- Wait for installation to complete, which should only take a few minutes, you’ll get a message saying “Elastic Agent has been successfully installed.” It’ll start collecting and sending logs to your Elastic SIEM right away, but keep in mind it might take a few minutes for the logs to show up in the SIEM.

You can check if the agent was installed correctly by running this command: sudo systemctl status elastic-agent.service

Generating Activity and Viewing Logs
Generating Security Events
To make sure the agent is working correctly, you can create some security-related events on your Kali VM. A good tool for this is Nmap. Nmap (Network Mapper) is a free, open-source utility used for network exploration, management, and security audits. It helps discover hosts and services on a network, essentially mapping it out. With Nmap, you can scan hosts for open ports, identify the operating system and software running on a target system, and gather other useful network information.
Running Nmap
Run a scan on Kali machine by running the command: sudo nmap localhost This is running an nmap scan of the Kali box itself. This scan generates several security events, such as the detection of open ports and the identification of services running on those ports.
Run a few more Nmap scans. This performs a TCP SYN scan: sudo nmap -sS localhost TCP connect scan is the default TCP scan type when SYN scan is not an option. Run this for a TCP Connection Scan: sudo nmap -sT localhost
Querying for Security Events in the Elastic SIEM
Check the Logs section in the Elastic Cloud instance to see the results.
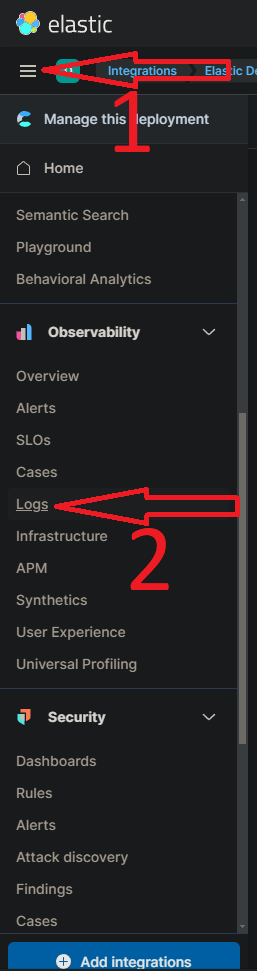
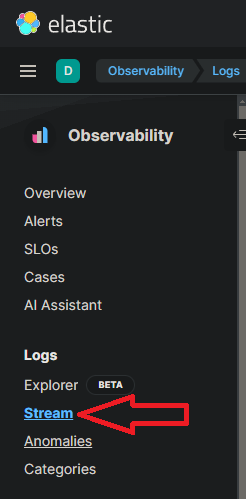
- Inside Elastic deployment click the hamburger menu and under “Observatory” at the bottom click “Logs”
NOTE: make sure to click stream.
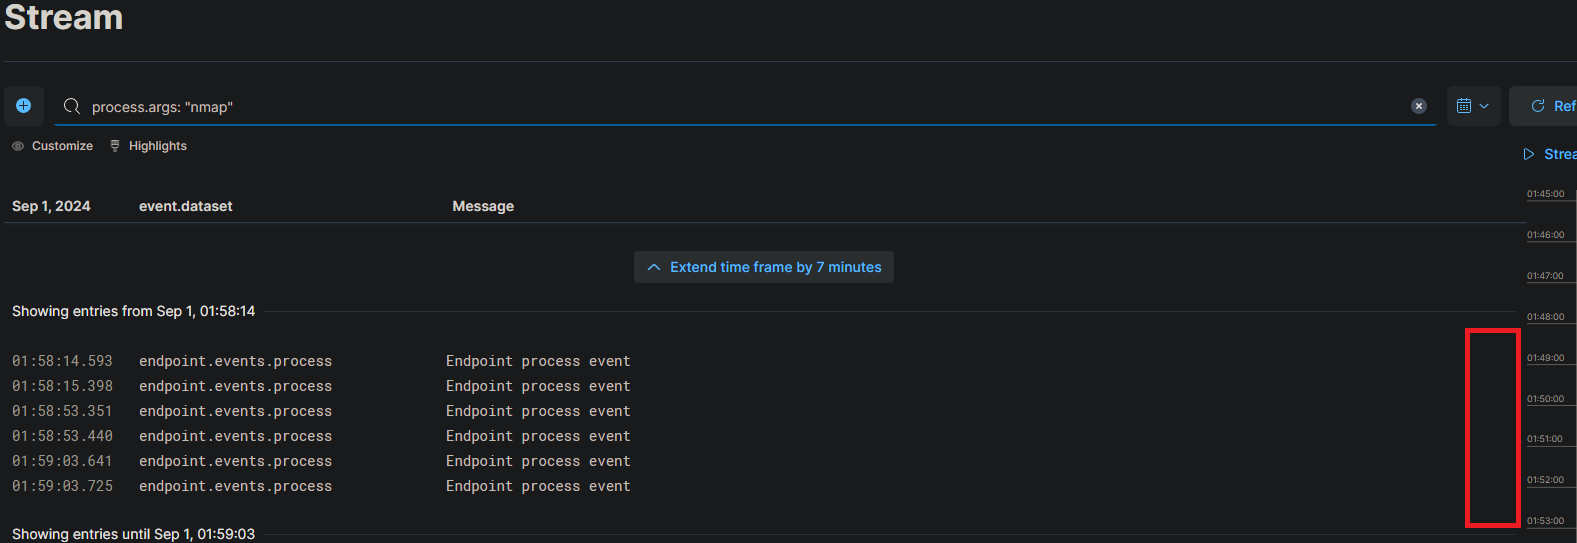
Search for events by typing in the search bar. For example to search for all logs related to Nmap scans, enter the query: event.action: “nmap_scan” or process.args: “sudo”.
The results of the search query will be displayed in the table below. You can click on the three dots next to each event to view more details.

By creating and analyzing different security events in Elastic SIEM—like the one we just talked about—or by generating authentication failures, like entering the wrong password for a user or trying SSH logins with an incorrect password, you can get a better grasp of how security incidents are detected, investigated, and handled in real-world situations.
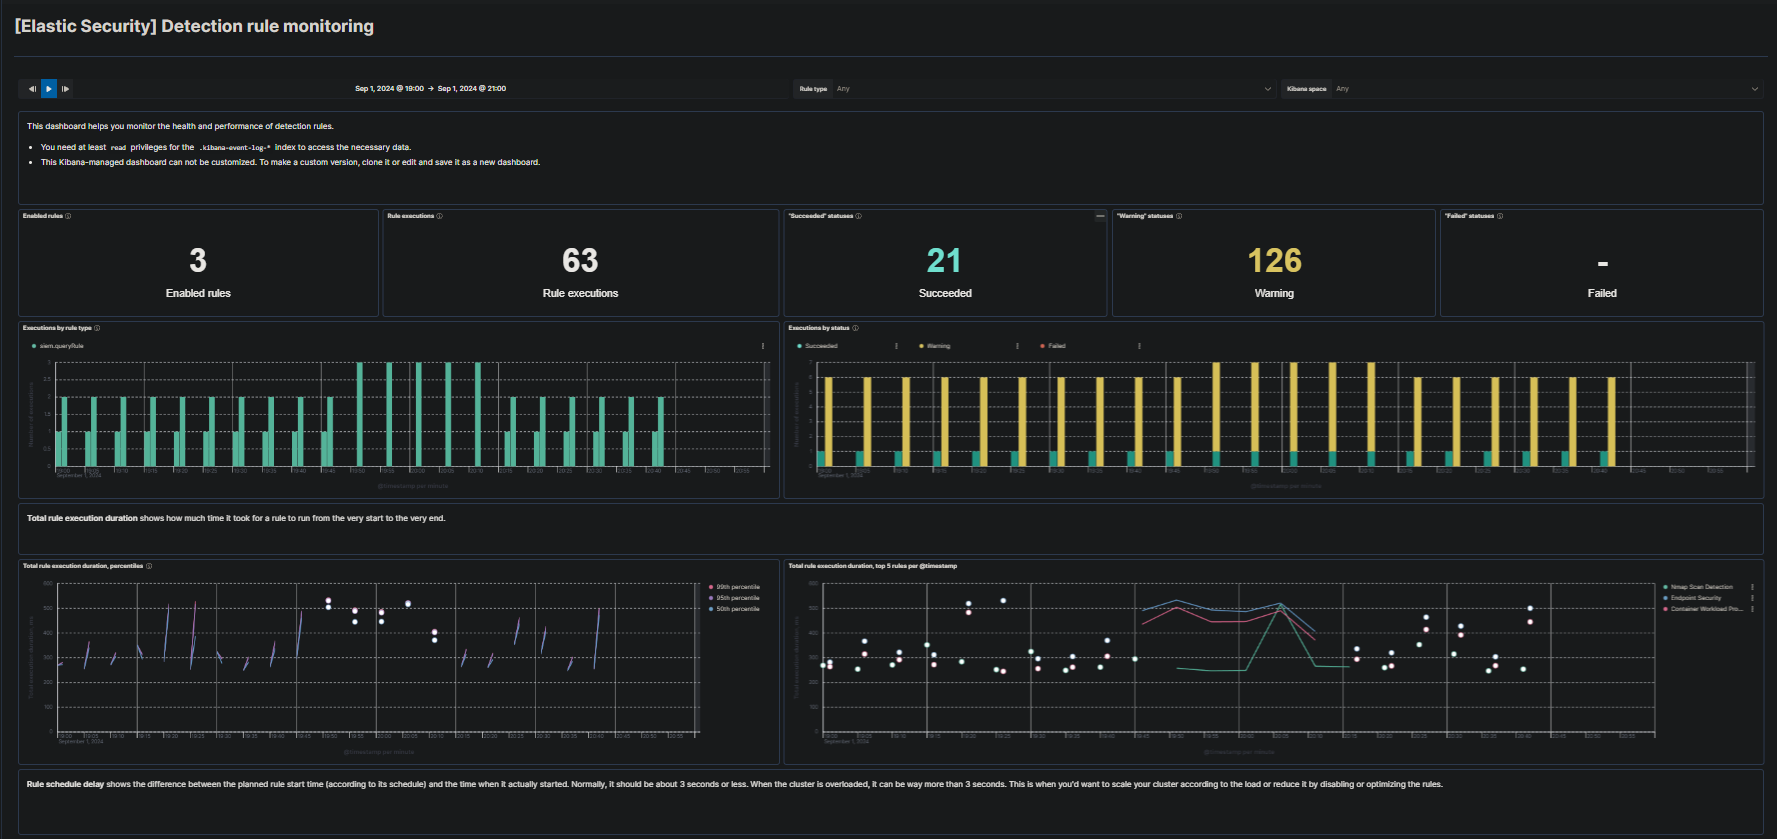
Creating Dashboard Events
You can also dive into the visualizations and dashboards in the SIEM app to analyze logs and spot patterns or anomalies in the data. For example, you could set up a simple dashboard that tracks the number of security events over time.
Create a Dashboard
- Navigate back to Elastic Web portal,
- Click the hamburger menu on the top-left, under analytics click on “Dashboards”
Click on the “Create dashboard” button on the top right to create a new dashboard.
Click on the “Create Visualization” button to add a new visualization to the dashboard.
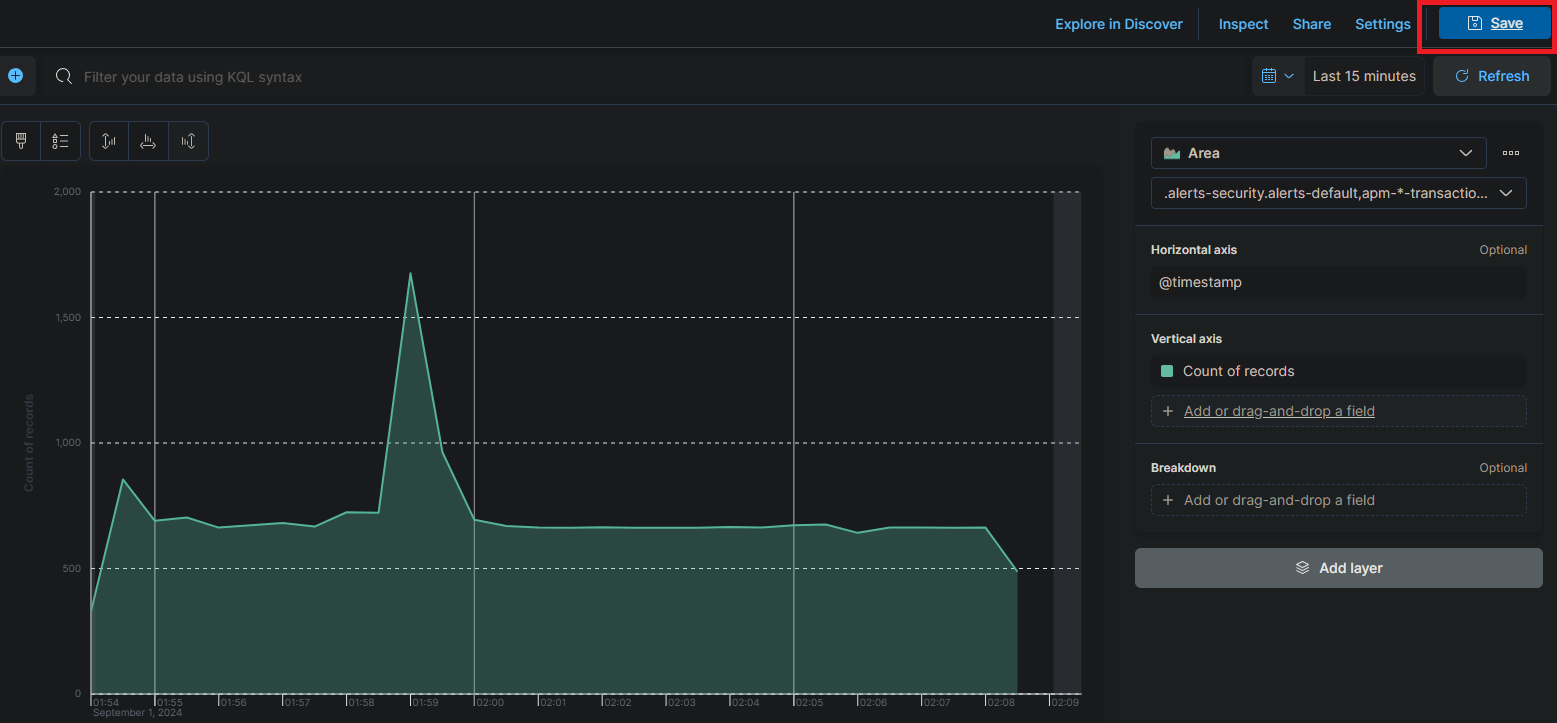
- Select “Area” or “Line” as the visualization type, depending on your preference. This will create a chart that shows the count of events over time.
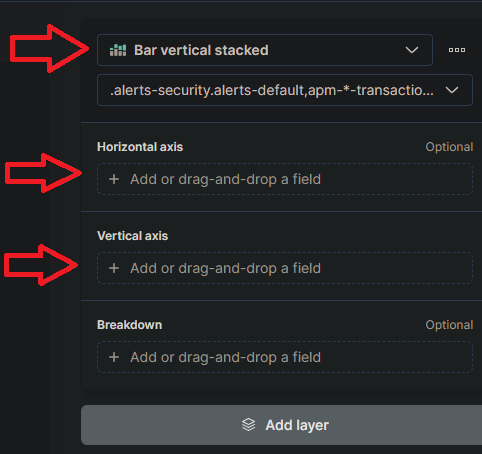
In the “Metrics” section of the visualization editor on the right, select “Count” as the vertical field type and “Timestamp” for the horizontal field. This will show the count of events over time.
Click on the “Save” button to save the visualization and then complete the rest of the settings.
Create an Alert
In a SIEM, alerts are super important for catching security incidents and responding quickly. They’re set up based on predefined rules or custom queries and can be configured to trigger specific actions when certain conditions are met. In this task, we’ll go through the steps to create an alert in Elastic SIEM to detect Nmap scans. By following these steps, you’ll be able to set up an alert that watches your logs for Nmap scan events and notifies you when they’re detected.
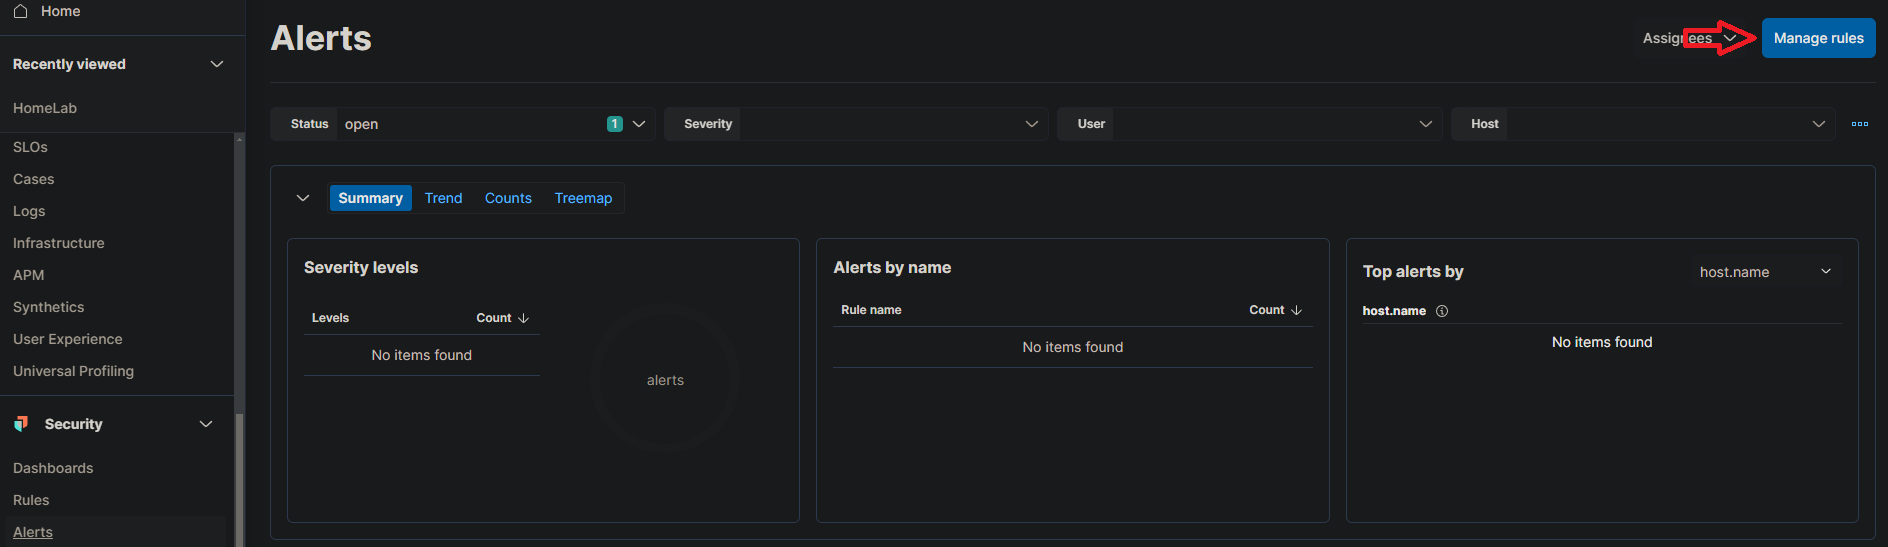
- Click on the menu icon on the top-left, then under “Security,” click on “Alerts.”
Click on “Manage rules” at the top right.
Click on the “Create new rule” button at the top right.
Under the “Define rule” section, select the “Custom query” option from the dropdown menu.
- Under “Custom query,” set the conditions for the rule. You can use the following query to detect Nmap scan events. event.action:”nmap_scan”

Under the “About rule” section, give your rule a name and a description (Nmap Scan Detection).
Set the severity level for the alert, which can help you prioritize alerts based on their importance. Keep all the other default settings under “Schedule rule” and click “Continue.”
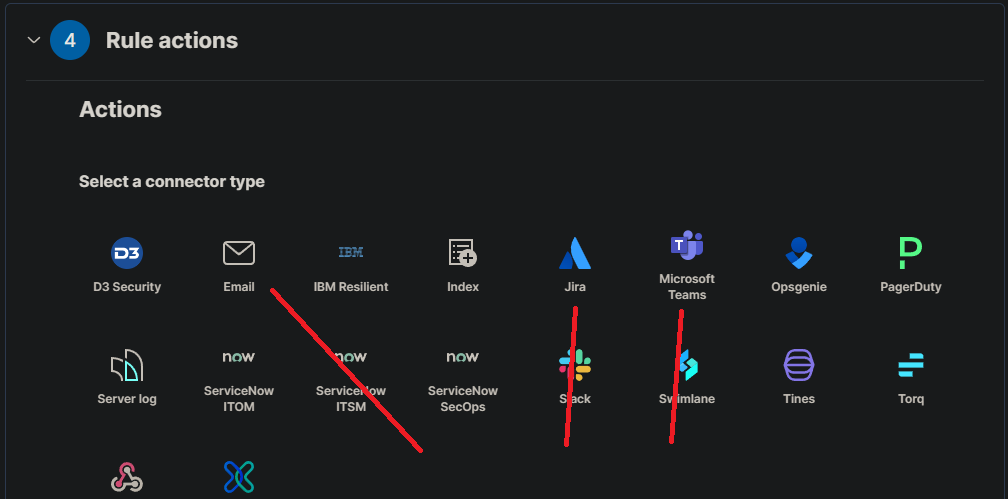
In the “Actions” section, select the action you want to take when the rule is triggered. You can choose to send an email notification, create a Slack message, or trigger a custom webhook.
Finally, click the “Create and enable rule” button to create the alert.
Once the alert is set up, it’ll keep an eye on your logs for any Nmap scan events. If it detects one, the alert will trigger, and the chosen action will kick in. You can view and manage all your alerts in the “Alerts” section under “Security.”
Expanding Lab Setup
After setting up this basic SIEM lab, the next logical step is to enhance your environment by adding more agents across your network. This will give you broader visibility and more comprehensive data to work with. Another idea is to develop additional dashboards and alerts tailored to different security events, allowing you to monitor various aspects of your network more effectively. If you’re aiming to become a SOC analyst, it’s also a good idea to research labs focused on alerts and detections. This will deepen your understanding of how different types of threats are identified and handled, giving you hands-on experience with the tools and techniques used in real-world security operations. Expanding your lab in these ways will not only strengthen your skills but also better prepare you for the demands of a SOC analyst role.